Table of Contents
How to use a secured API
This section describes the required steps to be able to access modules protected by the iReceptor Security Framework. The main component used to manage security is Keycloak.
ADC Repositories are protected by the adc-middleware service and leverages on Keycloak to manage users and permissions and determine data accessibility.
The various sections below show examples using CURL.
However, you may use the following postman collection that provides a convenient list of examples for various endpoints: Postman Collection
Public Data vs Protected Data
By default, any requests made to a secured API will return public data.
To access protected data, requests must include the header: Content-Protected: true
1. Authentication and Login
The first step is to acquire an access token. This is possible by logging on to the authentication server managed by Keycloak.
The example below uses a confidential client created on keycloak with the name “postman”. Confidential clients in Keycloak generate a unique ID every time their created, so they vary every installation. You'll need to acquire this ID manually.
To find out the URL that we have to query, we can make a request to an OAuth 2.0 endpoint called well-known: https://ireceptorplus.inesctec.pt/auth/realms/master/.well-known/openid-configuration
From the JSON response we can determine the token URL to be:
"token_endpoint":"https://ireceptorplus.inesctec.pt/auth/realms/master/protocol/openid-connect/token"
This is the URL that we'll use for requesting an access token.
cURL
curl https://{{keycloak url}}/realms/iReceptorPlus/protocol/openid-connect/token \
-H "Content-Type: application/x-www-form-urlencoded" \
-d "grant_type=password&username=<username>&password=password>&client_id=postman&client_secret={{client secret generated for postman}}"
Postman
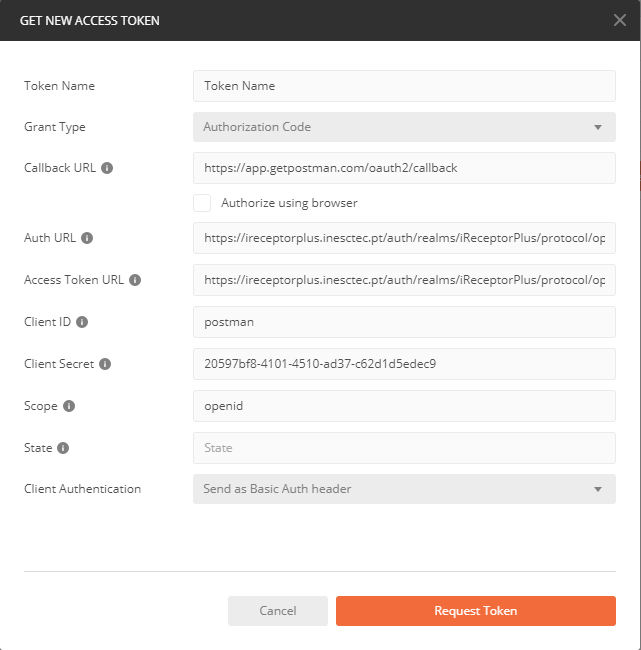
To use Postman's authentication workflow we also need to determine the authorization endpoint which can also be determine by the well-known configuration.
In this case it would be:
"authorization_endpoint":"https://ireceptorplus.inesctec.pt/auth/realms/master/protocol/openid-connect/auth"
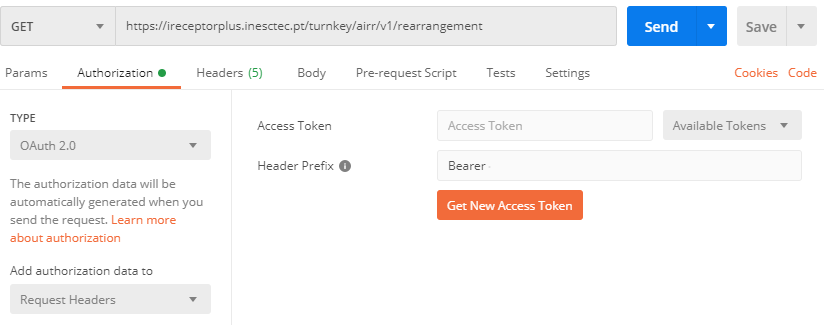
Then in Postman, select your Authorization type…

Fill in the endpoints as mentioned…

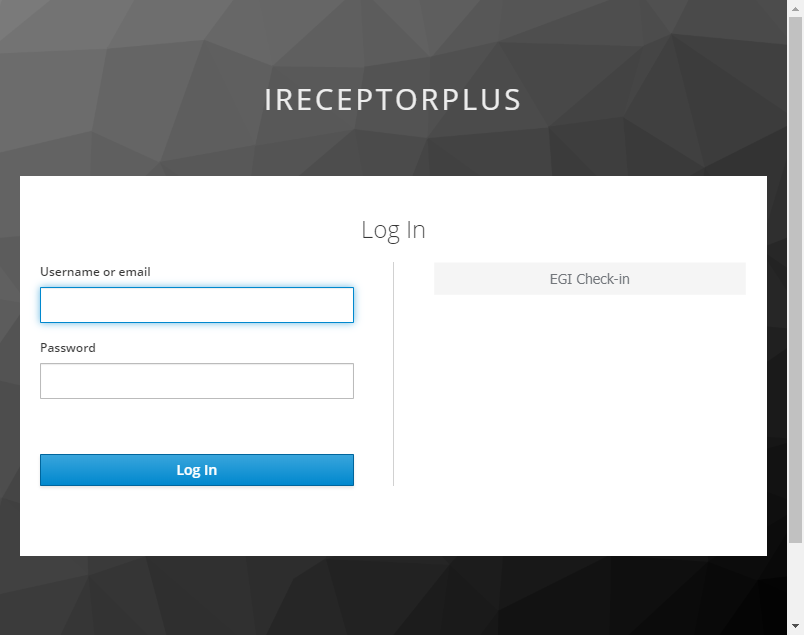
And after performing your authentication, Postman should have acquired your Access Token

2. Authorization
The process of authorization follows the workflow described in UMA 2.0.
Getting a Permission Ticket
The first step requires you to acquire a Permission Ticket, by making a a request to the repository protected by the Security Framework. No tokens should be provided.
curl --location --request  \
GET https://{{protected repository}}/airr/v1/repertoire/{{ID of some Repertoire}} \
-H "Content-Protected: true" \
 --head
Notice the “Content-Protected: true” Header.
If successful, you'll get a response header containing the permission ticket:
WWW-Authenticate: UMA as_uri="http://{{keycloak}}/auth/realms/master", ticket="{{Permission Ticket}}"
Getting an RPT
The next step involves sending the Permission Ticket obtained in the previous request to Keycloak, along with the Access Token obtained during the Authentication step. Data should be sent as x-www-form-urlencoded.
Using cURL, the request would look like:
curl --location --request POST 'http://{{keycloak}}/auth/realms/master/protocol/openid-connect/token' \
--header 'Content-Type: application/x-www-form-urlencoded' \
--header 'Authorization: Bearer {{Access Token}} \
--data-urlencode 'grant_type=urn:ietf:params:oauth:grant-type:uma-ticket' \
--data-urlencode 'ticket={{Permission Ticket}}'
If the user has permission to access the requested resource, you'll be able to acquire an RPT:
{
    "upgraded": false,
    "access_token":  {new RPT access token that will be used in the next step},
    "expires_in": 60,
    "refresh_expires_in": 1800,
    "refresh_token": {new refresh token that may be used to refresh the RPT} ,
    "token_type": "Bearer",
    "not-before-policy": 0
}
If the user doesn't have permission to access the requested resource: You'll receive HTTP status 403, along with the response body:
{
    "error": "access_denied",
    "error_description": "request_submitted"
}
An access request will be sent to the data steward that owns the resource.
Getting the protected resources
You're almost done!
Make a request as you normally would to get a resource, but this time, include the RPT acquired in the previous step and send it as a Bearer token:
curl --location --request \
GET 'http://{{protected repository}}/airr/v1/repertoire/{{ID of some Repertoire}}' \
-H 'Authorization: Bearer {{RPT}}' \
-H "Content-Protected: true"